

How to Choose LED Downlights – Complete Buying Guide
1. Core Lighting Parameters
① Power & Brightness (Lumen is more important than wattage)
-
Wattage reference (standard ceiling height 2.6–2.8m)
- Bedroom / Corridor: 3–5W
- Living room / Dining room: 6–9W
- Kitchen / Bathroom: 7–12W
Better metric: Lumen (lm)300–450lm (soft ambient), 500–800lm (main lighting)
② Color Temperature (CCT)
- 2700K–3000K Warm White: Bedroom, living room, lounge – cozy warm tone
- 3500K Neutral Warm: Balanced, suitable for dining room, study
- 4000K Natural White: Most versatile! Hallway, living room, office, kitchen
- 5000K–6000K Cool White: Garage, warehouse, bathroom; avoid long-time living space use
③ CRI – Color Rendering Index
- CRI ≥80: Basic household minimum
-
CRI ≥90 (Ra90): Recommended! True color, ideal for living room, clothing store, kitchen
Low CRI makes colors look dull and distorted.
④ Beam Angle
- 15°–24° Narrow beam: Accent lighting (decorations, artwork)
- 36°–45° Standard: General ambient lighting (most popular choice)
- 60°–120° Wide beam: Wide, soft flood light; large area uniform illumination
2. Installation Size – Cutout Hole (Critical!)
Measure your ceiling cut hole first before buying:
- Common sizes:
Φ70mm (3–5W)|Φ90mm (5–7W)|Φ110mm (7–9W)|Φ140mm (10–12W)
Do not guess! Old downlight hole size cannot be changed easily.
Two types:
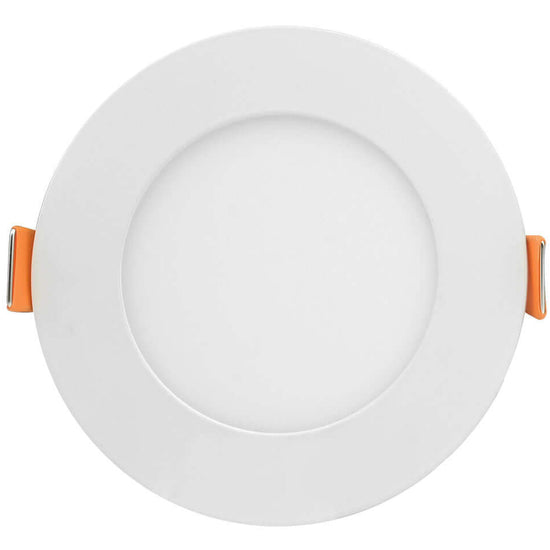
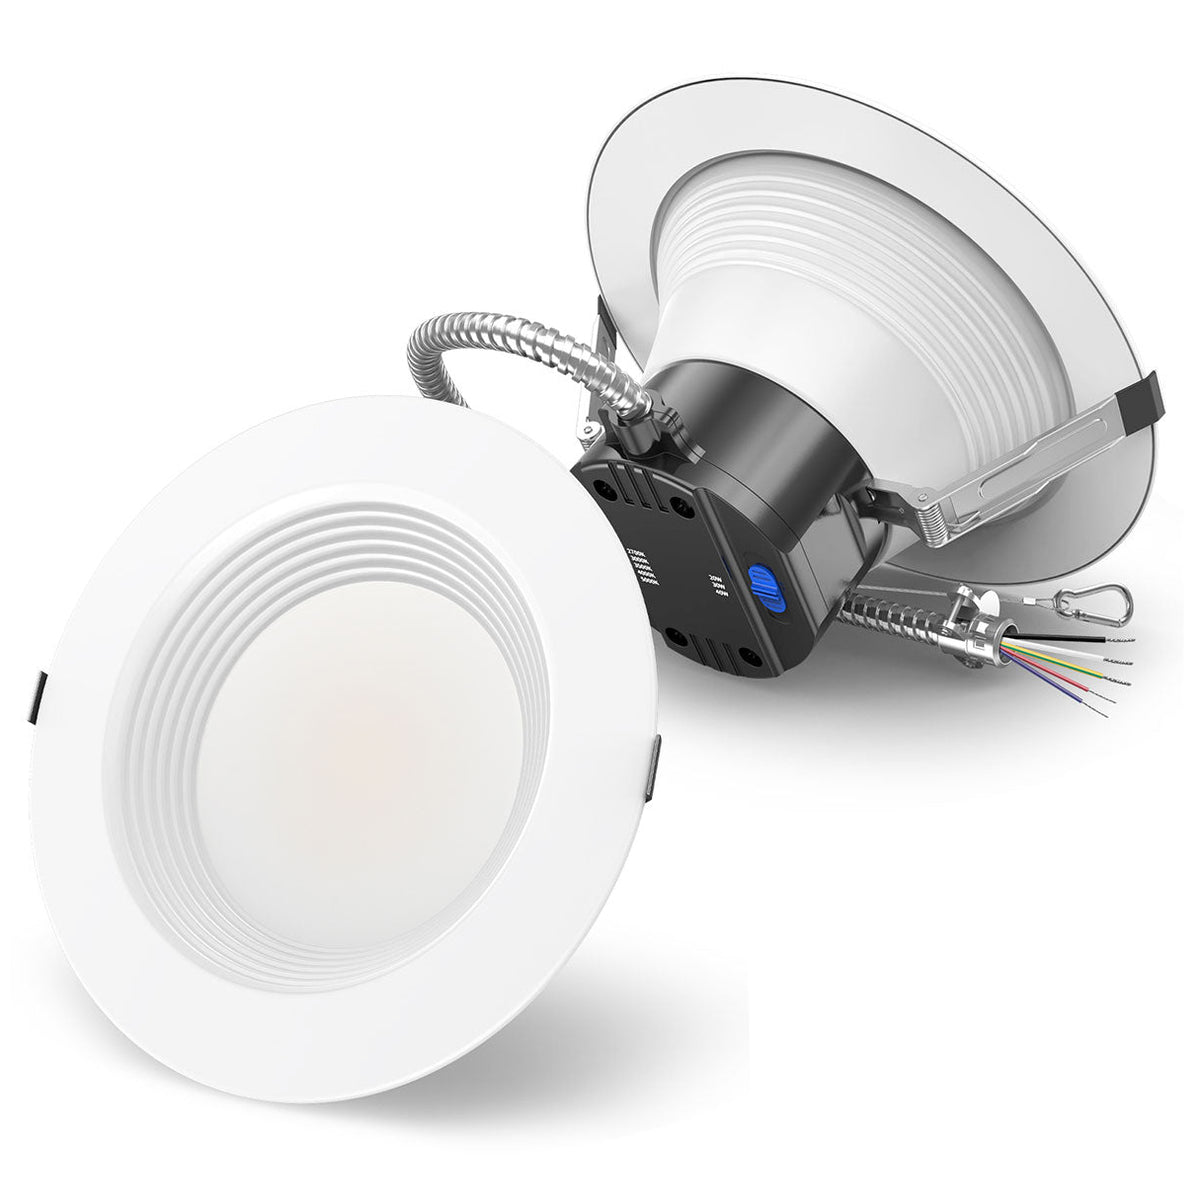
- Recessed downlight: Standard embedded ceiling
- Surface mounted downlight: No hole drilling, for solid concrete ceiling
3. Housing & Heat Dissipation
LED chips generate heat; poor heat sink = short lifespan, light decay fast.
- Good: Aluminum alloy housing (thick aluminum radiator)
- Bad: Thin plastic only (avoid long-term use)
4. IP Rating (Waterproof for humid areas)
- IP20: Dry place only – living room, bedroom, hallway
- IP44 / IP54: Bathroom, balcony, kitchen (anti-splash water)
Bathroom ceiling above shower area must use IP44+ waterproof model
5. Dimmable or Non-dimmable
- Ordinary non-dimmable: Cheaper, fixed brightness
- Dimmable LED downlight: Need matching dimmer switch!
Important: Normal lights cannot be dimmed randomly; you must buy dimmable driver + dimmable lamp as a set.
6. Light Type: Fixed / Adjustable Tilt
- Fixed downlight: Straight down illumination
- Tiltable (30°–35° adjustable): Flexible, aim at wall, paintings, cabinets
7. Driver (Power Supply)
Choose separate external driver (better heat dissipation, easier replacement)
Avoid cheap built-in driver models, high failure rate.
8. Anti-glare (UGR Value – Very important for eye comfort)
-
UGR<19: Low glare, comfortable for long stay (recommended for living & bedroom)
Deep anti-glare cup / honeycomb mesh design reduces direct light glare.
Quick Room Selection Checklist
table { border-collapse: collapse; width: 100%; } th, td { border: 1px solid #ccc; padding: 8px; text-align: left; }
| Space | Power | CCT | Suggestion |
|---|---|---|---|
| Bedroom | 3–6W | 2700–3500K | Low glare, warm light |
| Living Room | 6–9W | 3500–4000K | Ra≥90, UGR<19 |
| Kitchen | 7–10W | 4000K | IP44 recommended |
| Bathroom | 5–8W | 3500–4000K | Must IP44 waterproof |
| Corridor | 3–5W | 3000–4000K | Wide beam angle |
Avoid Common Pitfalls
- Do not only look at wattage; compare lumen and CRI
- Confirm cutout dimension before order
- Bath/balcony cannot use IP20 dry-type lights
- If you want dimming, buy matched dimmable driver
- Reject ultra-low-price plastic housing lights (fast light decay, short service life)
Great! Please share these details, and I’ll give you precise LED downlight specs:
- Which room(s) will you install them in? (living room / bedroom / bathroom / kitchen etc.)
- Ceiling height?
- Existing ceiling cutout hole diameter (mm)? Are you replacing old lights or installing new holes?
- Preferred light tone: warm white / natural white / cool white?
- Need dimming function?
- Any humid area (bathroom, balcony) → need waterproof IP rating?
- Do you want anti-glare deep recessed type?
How to Install Recessed LED Downlights (Step-by-Step Guide)
Warning: Always turn off the main circuit breaker before any electrical work! If you are unfamiliar with wiring, hire a qualified electrician.
Tools You Need
- Screwdriver
- Hole saw (match your downlight cutout size)
- Wire strippers
- Electrical tape / wire connectors
- Tape measure, pencil
- Safety goggles & dust mask
1. Preparations
- Switch OFF power at the electrical panel.
- Mark lamp positions on the ceiling. Keep 80–120 cm spacing between downlights for even lighting.
- Check the required cutout diameter printed on the downlight specification.
- Confirm ceiling thickness: Most LED downlights suit 5–25 mm plasterboard ceilings.
2. Cut Ceiling Hole (New Installation)
- Drill a small pilot hole in the marked position.
- Fit the hole saw into the drill and cut a clean circular hole.
- Clear ceiling dust and debris.
If replacing old downlights: Use the existing hole – double-check it matches the new light’s cutout size.
3. Run & Connect Wiring
LED downlights come with an external driver (power supply):
- Pull mains cable (220–240V AC) through the ceiling hole.
- Open the driver terminal block.
- Connect mains input (L/N/PE Earth) to driver input terminals.
- Connect the short low-voltage DC cable from the LED lamp to the driver output socket.
Use proper wire connectors; avoid loose twisted wires.Earth wire (green/yellow) must be connected for metal housing lamps.
4. Fit the Downlight into Ceiling
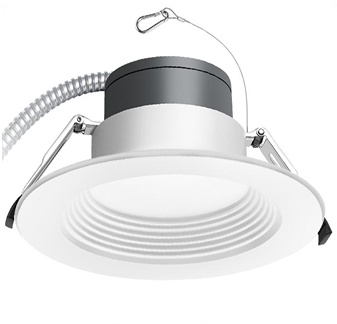
- Squeeze the two spring clips on both sides of the lamp body inward.
- Insert the lamp slowly through the ceiling hole.
- Release the springs; the clips will pop open and lock the light firmly against the ceiling backside.
Do not force the light if the hole is too small! Trimming the ceiling slightly.
5. Final Check & Power On
- Make sure all wiring is tucked safely above the ceiling (no crushed cables).
- Ensure the lamp sits flush with the ceiling surface.
- Turn the circuit breaker back on and test the light.
Important Special Notes
Dimmable LED Downlights
- Must use dimmable driver + compatible LED dimmer switch.
- Ordinary non-dimmable drivers cannot be dimmed; flickering will happen.
Bathroom / Balcony Waterproof (IP44/IP54) Models
- Keep the driver outside splash zones.
- Ensure cable entry points are sealed to prevent moisture ingress.
Common Installation Mistakes to Avoid
- Hole too big → lamp cannot be fixed and will drop down
- Hole too small → bending spring clips, easy to break
- Driver squeezed tightly in ceiling insulation → overheating, short lifespan
- Mixing up AC mains side and DC lamp side wiring
- Skipping power cut before wiring → electric shock risk
Surface Mount LED Downlight (No Ceiling Hole Needed)
Installation is simpler:
- Fix the mounting base onto ceiling with screws.
- Wire mains cable to the driver.
- Clip the lamp body onto the fixed base.
How to Install Recessed LED Downlights (Step-by-Step Guide)
Warning: Always turn off the main circuit breaker before any electrical work! If you are unfamiliar with wiring, hire a qualified electrician.
Tools You Need
- Screwdriver
- Hole saw (match your downlight cutout size)
- Wire strippers
- Electrical tape / wire connectors
- Tape measure, pencil
- Safety goggles & dust mask
1. Preparations
- Switch OFF power at the electrical panel.
- Mark lamp positions on the ceiling. Keep 80–120 cm spacing between downlights for even lighting.
- Check the required cutout diameter printed on the downlight specification.
- Confirm ceiling thickness: Most LED downlights suit 5–25 mm plasterboard ceilings.
2. Cut Ceiling Hole (New Installation)
- Drill a small pilot hole in the marked position.
- Fit the hole saw into the drill and cut a clean circular hole.
- Clear ceiling dust and debris.
If replacing old downlights: Use the existing hole – double-check it matches the new light's cutout size.
3. Run & Connect Wiring
LED downlights come with an external driver (power supply):
- Pull mains cable (220–240V AC) through the ceiling hole.
- Open the driver terminal block.
- Connect mains input (L/N/PE Earth) to driver input terminals.
- Connect the short low-voltage DC cable from the LED lamp to the driver output socket.
Use proper wire connectors; avoid loose twisted wires.Earth wire (green/yellow) must be connected for metal housing lamps.
4. Fit the Downlight into Ceiling
- Squeeze the two spring clips on both sides of the lamp body inward.
- Insert the lamp slowly through the ceiling hole.
- Release the springs; the clips will pop open and lock the light firmly against the ceiling backside.
Do not force the light if the hole is too small! Trimming the ceiling slightly.
5. Final Check & Power On
- Make sure all wiring is tucked safely above the ceiling (no crushed cables).
- Ensure the lamp sits flush with the ceiling surface.
- Turn the circuit breaker back on and test the light.
Important Special Notes
Dimmable LED Downlights
- Must use dimmable driver + compatible LED dimmer switch.
- Ordinary non-dimmable drivers cannot be dimmed; flickering will happen.
Bathroom / Balcony Waterproof (IP44/IP54) Models
- Keep the driver outside splash zones.
- Ensure cable entry points are sealed to prevent moisture ingress.
Common Installation Mistakes to Avoid
- Hole too big → lamp cannot be fixed and will drop down
- Hole too small → bending spring clips, easy to break
- Driver squeezed tightly in ceiling insulation → overheating, short lifespan
- Mixing up AC mains side and DC lamp side wiring
- Skipping power cut before wiring → electric shock risk
Surface Mount LED Downlight (No Ceiling Hole Needed)
Installation is simpler:
- Fix the mounting base onto ceiling with screws.
- Wire mains cable to the driver.
- Clip the lamp body onto the fixed base.
LED Downlight Driver Wiring Diagram (Text Version, 220–240V Household AC)
Two separate sides on the LED driver, never mix them up:
INPUT = Mains AC (220V, from wall power)OUTPUT = Low voltage DC (to LED lamp)
1. Driver Input Terminals (AC Mains Side)
Labels usually: L / N / ⊕ (Earth PE)
- L (Live) → Brown wire from household circuit
- N (Neutral) → Blue wire from household circuit
- PE / Earth (Ground) → Green & Yellow wire
Metal downlight housing: Earth wire is mandatory.
Plastic body lights sometimes have no earth terminal.
2. Driver Output Terminals (DC Side, to lamp)
Labels usually: V+ / V−
- V+ (Positive) → positive wire of LED lamp
- V− (Negative) → negative wire of LED lamp
If reversed: Light won’t turn on (no damage, just swap wires)
Simple Wiring Sequence
- Mains cable → Driver Input (L, N, PE)
- Driver Output → LED downlight lamp
- Tuck driver and cables above ceiling, do not squash driver with thermal insulation
Dimmable Version Extra Tip
Standard Triac dimmable driver: same L/N input wiring.
You must install a TRIAC LED dimmer on the wall live wire (between power supply and driver L line).
If you use a regular switch, dimming function cannot work.
Common Wiring Mistake Warning
Do not connect 220V mains directly to the LED lamp! This burns out the light instantly. The lamp only receives low voltage power via the driver.
LED Downlight Driver Wiring Diagram (Text Version, 220–240V Household AC)
Two separate sides on the LED driver, never mix them up:
INPUT = Mains AC (220V, from wall power)
OUTPUT = Low voltage DC (to LED lamp)
1. Driver Input Terminals (AC Mains Side)
Labels usually: L / N / ⊕ (Earth PE)
- L (Live) → Brown wire from household circuit
- N (Neutral) → Blue wire from household circuit
- PE / Earth (Ground) → Green & Yellow wire
Metal downlight housing: Earth wire is mandatory.
Plastic body lights sometimes have no earth terminal.
2. Driver Output Terminals (DC Side, to lamp)
Labels usually: V+ / V−
- V+ (Positive) → positive wire of LED lamp
- V− (Negative) → negative wire of LED lamp
If reversed: Light won’t turn on (no damage, just swap wires)
Simple Wiring Sequence
- Mains cable → Driver Input (L, N, PE)
- Driver Output → LED downlight lamp
- Tuck driver and cables above ceiling, do not squash driver with thermal insulation
Dimmable Version Extra Tip
Standard Triac dimmable driver: same L/N input wiring.
You must install a TRIAC LED dimmer on the wall live wire (between power supply and driver L line).
If you use a regular switch, dimming function cannot work.
Common Wiring Mistake Warning
Do not connect 220V mains directly to the LED lamp! This burns out the light instantly. The lamp only receives low voltage power via the driver.
LED Downlight Installation Checklist (Save for On-site Use)
Pre-Work Safety
Turn off main circuit breaker; test no power with voltage tester
Prepare tools: screwdriver, wire strippers, wire connectors, measuring tape
Confirm downlight cutout size matches ceiling hole
Check ceiling thickness (5–25mm standard for recessed springs)
Ceiling Hole (New Install)
Mark light positions, spacing: 80–120cm apart
Cut clean circular hole; remove dust/debris
If replacing old lights: verify hole diameter fits new lamp
Wiring Step
- Mains cable → Driver INPUT (AC side)
- L (Live) = Brown
- N (Neutral) = Blue
- PE Earth = Green/Yellow (mandatory for aluminum lamps)
- Driver OUTPUT (DC V+/V−) → LED lamp wires
Reverse DC wires = light no power, no permanent damageAll joints sealed with wire connectors; avoid bare twisted wiresDriver placed freely, not compressed by thermal insulation
Mounting Lamp
Squeeze both spring clips
Insert lamp through ceiling hole gently
Release springs, confirm lamp sits flush & secured
Hide all wiring above ceiling, no cable squeezing
Final Test
Double-check all wiring separation: AC input ≠ DC output
Switch power on, test lighting
Dimmable model: verify smooth brightness, no flickering
Special Environment Reminders
- Bathroom/Balcony (IP44/IP54): Seal cable entry, keep driver away from water splashes
- Dimmable lights: Use matched dimmable driver + LED dimmer
Must Avoid
Connect 220V directly to LED lamp (burn chip immediately)
Over-sized hole (lamp falls) / undersized hole (break springs)
Leave loose exposed wires
Work with electricity powered on.


