

High bay lights are designed specifically for spaces with high ceilings to provide bright, uniform illumination over large areas.
As a general rule, high bay lights should be installed at mounting heights of 15 feet or higher.
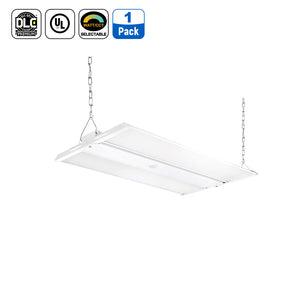
Here is a breakdown of ideal mounting heights, recommended lumen output, and light spacing:
Mounting Height & Wattage/Lumen Guidelines
| Mounting Height | Recommended Wattage | Recommended Lumen Output | Best For |
| 15 – 20 feet | 100W – 150W | 13,000 – 20,000 lm | Small warehouses, workshops, small commercial buildings |
| 20 – 30 feet | 150W – 240W | 20,000 – 33,000 lm | Medium-to-large warehouses, manufacturing facilities, gyms |
| 30 – 40 feet | 240W – 300W+ | 33,000 – 45,000+ lm | High-ceiling industrial plants, large distribution centers, airplane hangars |
| 40+ feet | 300W – 400W+ | 45,000+ lm | Extreme height distribution hubs, specialized industrial facilities |

Key Installation & Spacing Tips
-
Ceiling Height Rule: If your ceiling height is under 15 feet, standard low bay lights or flat panel LEDs are usually a better choice to avoid glare and harsh hotspots.
-
Spacing Distance:
-
At 15–20 feet: Space fixtures roughly 10 to 12 feet apart.
-
At 20–30 feet: Space fixtures roughly 12 to 18 feet apart.
-
At 30+ feet: Space fixtures roughly 20 feet or more apart.
-
-
Beam Angle Matters:
-
Lower heights (15–20 ft): Wider beam angles (e.g., $120^\circ$) help spread light evenly without excessive glare.
-
Taller heights (25+ ft): Narrower beam angles (e.g., $60^\circ$ or $90^\circ$) help focus light downward to reach floor level effectively.
-
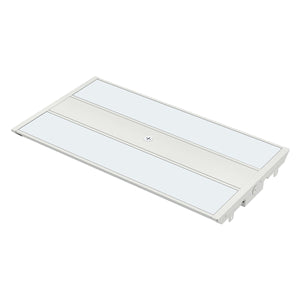
In warehouses and workshops, high bay lights should generally be installed at mounting heights between 15 and 40+ feet. Standard low bay fixtures are typically recommended for ceiling heights under 15 feet to prevent glare and harsh hotspots.
Height, Lumens & Spacing Recommendations
| Ceiling Height | Ideal Fixture Wattage | Target Lumen Output | Fixture Spacing | Best For |
| 15 – 20 ft | 100W – 150W | 14,000 – 21,000 lm | 12 – 15 ft apart | Small workshops, maintenance bays, low-racking warehouses |
| 20 – 30 ft | 150W – 200W | 21,000 – 30,000 lm | 15 – 18 ft apart | Standard manufacturing floors, mid-size warehouses |
| 30 – 40+ ft | 200W – 300W+ | 30,000 – 45,000+ lm | 20 – 25+ ft apart | Large distribution centers, high-bay storage, heavy industrial plants |
Critical Considerations for Warehouses vs. Workshops
-
Target Light Levels (Foot-Candles):
-
Warehouses / Storage: Target 20–30 foot-candles. You can space fixtures wider apart (around 0.9–1.2× the mounting height).
-
Workshops / Manufacturing: Target 50–75+ foot-candles for detail-oriented assembly or machinery work. Use closer spacing (around 0.8× the mounting height) to avoid shadows.
-
-
Beam Angle Selection:
-
Wide Beam ( $120^\circ$): Best for open floor plans with ceilings between 15–20 feet.
-
Medium to Narrow Beam ( $60^\circ – 90^\circ$): Best for heights above 25 feet or tall warehouse aisles to direct light straight down between high-density racking.

-
High bay LED layout calculator tips
When designing a high bay LED lighting layout for a warehouse or workshop, using a layout tool or calculator (like DIALux, RELUX, or manufacturer calculation tools) requires key parameters to ensure proper light levels without creating dark spots or excessive glare.
Here are the essential tips and formulas to get accurate results from a high bay layout calculator:
1. Know Your Target Light Level (Foot-Candles / Lux)
Enter the target light level based on how the space is used:
-
Active Workshop / Assembly / Tool Use: 50 – 75 foot-candles (500–750 lux) for high visual clarity and detail work.
-
Open Storage / General Warehouse: 20 – 30 foot-candles (200–300 lux) for safe movement and general material handling.
-
High-Density Racking / Fine Pick & Pack: 30 – 50 foot-candles (300–500 lux) at floor level, ensuring vertical faces of racks are also visible.
2. Space-to-Mounting-Height Ratio (S/MH)
To calculate rough spacing between fixtures:
-
Workshops: Use a lower ratio ($0.8 \times \text{Height}$) for tighter spacing, minimizing shadows cast by tools or machinery.
-
Warehouses: Use a higher ratio ($1.0 \text{ to } 1.2 \times \text{Height}$) for broader coverage across wide aisles or open storage zones.
-
Distance from Walls: Set perimeter fixtures at half the spacing distance ($0.5 \times \text{Spacing}$) from the walls to eliminate dark corners.
3. Factor in Reflectance Ratings
Calculator tools allow you to input surface reflection percentages. Standard industrial default settings:
| Surface | Typical Industrial Reflectance | Note |
| Ceiling | 50% (White/Light) / 20% (Open Deck/Dark Steel) | Open trusses absorb more light. |
| Walls | 30% – 50% | Unpainted concrete block reflects poorly; painted drywall reflects higher. |
| Floor | 20% | Polished concrete reflects up to 30–40%; dark coated concrete is 10–20%. |
4. Account for Light Loss Factor (LLF)
Always set the Light Loss Factor (LLF) between 0.80 and 0.85 in your calculator rather than using 1.0. This accounts for:
-
Dirt Deposition (LDF): Dust accumulation on lenses over time.
-
Lumen Depreciation (LLD): Gradual LED diode degradation over its operational lifespan.
5. Account for Warehouse Racking & Vertical Illumination
-
Aisle Alignment: In racked warehouses, position fixtures along the centerlines of aisles rather than using a uniform grid layout.
-
Beam Angle: Select narrow optics ($60^\circ \text{ or } 90^\circ$) in tall aisle environments so light penetrates down to lower shelf tiers rather than spilling onto the tops of racking.
Call +1 718-688-9188 to speak with a US-based lighting professional expert or browse High Bay lights at www.jcelighting.com.


