

Common Materials for Low‑Voltage Landscape Lighting Fixtures
The material directly determines rust resistance, UV durability, heat dissipation and service life for outdoor garden lights.
1. Die‑cast / Cast Aluminum (Most Popular Premium Choice)
- Pros: Lightweight yet strong, excellent anti‑rust performance, good heat dissipation for LED chips, accepts different powder‑coat finishes (black, bronze, antique copper). Resists rain, frost and UV sunlight.
- Cons: Higher price than plastic; surface powder coating may scratch if hit hard.
- Best for: Path lights, spotlights, well lights, long‑term year‑round outdoor use. Most mid‑to‑high‑end landscape lights use this material.
2. Plastic (ABS / Polycarbonate — Budget‑level)
- Pros: Low cost, light weight, will never rust. Polycarbonate lens is shatter‑resistant.
- Cons: Susceptible to UV degradation. Over years sun exposure makes plastic brittle, faded, cracked. Thin cheap plastic stakes break easily in hard soil.
- Best for: Temporary lighting, low‑traffic gardens, short‑term use. Not ideal for permanent high‑end landscape projects.
Note: Plastic is often used only for stakes or lens covers, not the main housing on quality fixtures.
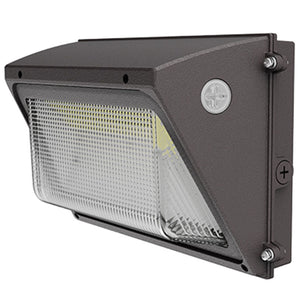
3. Brass (High‑end, luxury grade)
- Pros: Extremely corrosion‑resistant. Solid brass ages beautifully, developing natural patina over time. Outstanding durability for wet, coastal salty‑air environments.
- Cons: Very expensive, heavy.
- Best for: Luxury gardens, coastal locations, well lights, permanent high‑value installations.
4. Stainless Steel
- Pros: Rust‑resistant, sleek modern look, works well near salt spray.
- Cons: Prone to water spot staining; lower heat dissipation than aluminum. Thin‑gauge stainless steel may dent.
- Best for: Contemporary‑style gardens, deck lights, coastal areas. Avoid cheap thin stainless‑steel variants.
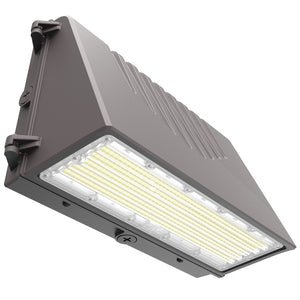
5. Lens / Cover Materials
Lenses protect LED chips and shape light output:
- Tempered glass: Premium option. Clear, heat‑resistant, scratch‑resistant, does not yellow with UV light. Used in aluminum and brass fixtures.
- Polycarbonate plastic: Impact‑resistant, shatter‑proof. Budget fixtures. Will slowly turn hazy / yellow after long sun exposure.
Materials to avoid
- Uncoated plain steel / iron: Quickly rusts outdoors, stains soil and stone surfaces.
- Thin low‑grade plastics for main lamp housing: short service life.
Quick comparison summary
| Material | Rust Resistance | Durability | Cost | Typical Application |
|---|---|---|---|---|
| Cast Aluminum | Very good | High | Mid | General garden fixtures |
| Brass | Excellent | Highest | High‑end | Luxury & coastal projects |
| Stainless Steel | Good | Medium‑High | Mid‑High | Modern, coastal lighting |
| ABS Plastic | No rust, but UV‑weak | Low | Budget | Temporary, entry‑level lights |
Choosing suitable 12‑V landscape fixtures depends on lighting purpose, light performance, build quality, and system compatibility
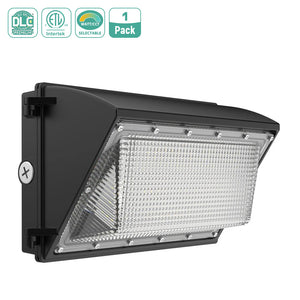
1. Pick fixture types by garden application
Match fixture style to what you want to illuminate:
- Path lights: Low‑height, diffused light. For walkways, lawn borders. Prevent glare; keep light directed toward ground, not into eyes.
- Spotlights / uplights: Adjustable angle, narrow beam. Uplight tree trunks, large shrubs, statues, walls.
- Well lights (in‑ground lights): Recessed into ground. Uplight trees, facades; stay out of sight. Good for high‑traffic areas.
- Deck / step lights: Mounted on steps, railings, patios. For safety on stairs.
- Hardscape lights: For walls, retaining walls. Soft accent lighting.
Rule: Use “see the light, not the fixture”. Avoid exposed bare bulbs facing sightlines.
2. Light source: choose LED
Always select integrated 12‑V LED fixtures.
- Far lower power draw, less heat output, long service life.
- Halogen is brighter but uses much more wattage, burns hot, needs frequent bulb replacement. Not recommended for modern gardens.
3. Key light‑performance parameters
Color Temperature (CCT)
- 2700K‑3000K warm white: Best for most gardens; natural golden tone for plants, trees and patios, cozy night atmosphere.
- 4000K neutral white: crisp, for paths and security areas; can look harsh for ornamental plant lighting.
- Avoid cool 5000K+ blue‑white light for garden ambience.
Brightness (Lumens)
- Path lights: 50‑150 lm (soft guiding light, not blinding)
- Spotlights for trees & features: 150‑400 lm
Do not chase maximum brightness. Over‑bright fixtures create glare and wash out garden details.
Beam angle
- Narrow beam (15°‑25°): spotlight tall trees, focal sculptures.
- Wide beam (40°‑60°): wash walls, large shrubs, paths.
CRI (Color Rendering Index)
Choose CRI ≥80. High CRI renders real colours of leaves, flowers and stone at night.
4. Build quality & weather resistance
Material
- Cast aluminum / die‑cast aluminium: preferred. Anti‑rust, good heat dissipation, long‑lasting for outdoor use
- Plastic: low‑cost option; may become brittle under long‑term UV sunlight, shorter lifespan.
- Avoid plain uncoated steel: will rust quickly outdoors.
IP rating (water‑dust proof)
- Minimum IP65 for most garden fixtures (rain‑proof, dust‑tight).
- For buried well‑lights or waterside installation: IP67.
- Under‑water pond lights: IP68.
Stakes & accessories
Check that ground stakes are thick and sturdy. Thin plastic stakes break easily in hard or rocky soil. Metal stakes are more durable.
5. System compatibility (critical)
- Confirm fixtures are 12‑V low‑voltage, NOT 120‑V mains‑voltage.
- Sum up total wattage of all selected fixtures. Your transformer’s rated wattage must be 20 % higher than total load to handle voltage drop and future additions.
- Confirm connection method: match your system’s cable‑tap style.
6. Style & layout tips
- Keep fixture finishes consistent (black, bronze, antique copper) to match house and garden decor.
- Mix fixture types: path lights for safety + spotlights for focal points. Do not use only one fixture style everywhere.
- Leave room for expansion: pick fixtures from the same product series if you plan to add more lights later.
Common mistakes to avoid
- Buying overly bright fixtures that produce strong glare.
- Using high‑voltage fixtures on a 12‑V low‑voltage transformer.
- Choosing cheap thin‑plastic fixtures for year‑round outdoor exposure.
- Ignoring total wattage, overloading the transformer.
How to Install Low‑Voltage Landscape Lighting for Your Garden
Low‑voltage landscape lighting (12V) is safe, easy for DIY installation, and ideal for illuminating paths, trees, flower beds, and garden features.
Tools & Materials You Will Need
Main parts
- Low‑voltage landscape lights (path lights, spotlights, well lights, string lights etc.)
- 12‑2 low‑voltage landscape cable
- Transformer (12‑volt power pack, match total wattage of all fixtures; add 20% extra capacity)
- Cable connectors / wire nuts (weather‑resistant)
- Ground stakes for fixtures
Tools
- Shovel / garden trowel
- Wire strippers
- Tape measure
- Gloves
- Landscape staples (to bury or secure cable)
Important note: The transformer must plug into a GFCI‑protected outdoor electrical outlet.
Step‑by‑Step Installation Guide
Step 1: Plan your lighting layout
- Walk through your garden and mark positions for each light: along walkways, beside shrubs, up trees, around patios.
- Calculate total wattage of all lights. Choose a transformer whose maximum wattage is higher than total fixture watts (add ~20% headroom).
- Map the cable route: run cable from the transformer to each light location. Try to keep cable runs under 30‑45 m to avoid voltage drop.
Step 2: Mount the transformer
- Mount the transformer on an exterior wall, at least 30 cm above ground. Keep it away from direct rain splash if possible.
- Plug its power cord into a GFCI outdoor socket. Do not daisy‑chain extension cords.
Step 3: Lay out the low‑voltage cable
- Unroll the 12‑2 cable from transformer out to all light positions. You can lay it loosely on the ground first to test positions before burying.
- Do not cut the cable into separate short pieces; use one main run and tap off for each fixture.
Voltage drop tip: Long cable runs cause dim lights. If you have many lights far away, use thicker gauge cable or split into two circuits from transformer.
Step 4: Connect fixtures to the main cable
Low‑voltage systems commonly use “tap‑splice” connection:
- Strip a small section of insulation from the main cable (do not cut the whole cable through).
- Use weather‑proof cable connectors to join the fixture wires to the two main cable conductors. Make sure metal wires make solid contact.
- Seal every connection completely against moisture; damp connections cause corrosion and failure.
Never plug in the transformer while you are wiring lights. Power must be off during all wiring work.
Step 5: Position and secure lights
- Push each light’s ground stake firmly into soil. For hard ground, make a pilot hole with a trowel first.
- Aim spotlights: tilt them to light tree trunks, statues or garden walls. Adjust angles for best visual effect.
Step 6: Bury or hide the cable
- Bury cable 10‑15 cm deep under soil or mulch.
- Alternatively, tuck it under gravel, behind plantings, or fasten with landscape staples on top of ground and cover with mulch.
- Do NOT bury low‑voltage cable in the same trench with high‑voltage household wiring.
Step 7: Test and adjust
- Double‑check all connections are secure and waterproof.
- Plug in the transformer. Turn it on.
- Check every light. If some are dim: this is usually voltage drop. Reduce run length, upgrade cable gauge, or split loads.
- Most transformers have timer / photocell functions: set it so lights turn on at dusk and off at bedtime.
Safety & Pro Tips
- Only use 12‑volt landscape‑rated products. Do not mix household 120V line‑voltage parts.
- All outdoor power outlets need GFCI protection for shock safety.
- Keep cable away from digging zones; mark cable routes mentally so you do not pierce it when gardening.
- Leave slack wire near each fixture to allow moving plants or adjusting light position later.
- In winter: check connections for moisture; clean light lenses regularly.
Common problems
- Lights not turning on → check transformer power plug, GFCI tripped, loose wire taps.
- Some lights dim → voltage drop from too‑long cable run or overloaded transformer.
- Lights fail after rain → poor waterproofing at wire splices.
If you want, I can rewrite this as a short simplified checklist or translate key steps into Chinese for you.
What are the advantages of low voltage landscape lighting?
Advantages of Low‑Voltage (12V) Landscape Lighting
Low‑voltage landscape lighting operates at 12‑volt, powered by a step‑down transformer from standard household mains. It is the most popular choice for home gardens.
1. Higher safety
- Greatly reduced electric shock risk. The 12‑V output is harmless to humans and pets, even if wires get nicked, damp or accidentally exposed in soil.
- Unlike high‑voltage line‑voltage lights, it poses little danger during garden digging, lawn mowing or wet weather.
2. Easy DIY installation
- No licensed electrician is required for most setups. Homeowners can lay cables, connect fixtures and stake lights themselves.
- Flexible thin landscape cable is simple to cut, route and hide under mulch, soil or gravel.
- Fixtures are lightweight and easy to re‑position when you redesign garden beds.
3. Lower energy consumption
- Most modern low‑voltage garden lights use LED bulbs, which consume very little electricity.
- The whole lighting system runs with modest wattage, keeping long‑term electricity bills low.
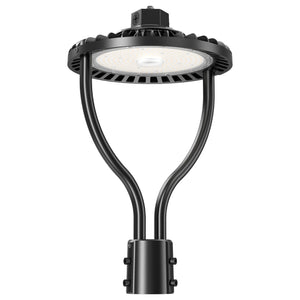
4. Rich design flexibility
- Wide selection of fixture types: path lights, spotlights, well lights, uplights, deck lights and string lights.
- Soft, gentle light output creates cozy ambient garden atmosphere; you can adjust beam angles to highlight trees, sculptures, walkways or water features.
- Supports timers and photocells built into transformers for automatic dusk‑to‑dawn control.
5. Cost‑effective
- Fixtures and cables are generally cheaper than high‑voltage outdoor lighting systems.
- LED lamps have long service life, which cuts replacement and maintenance costs.
6. Simple modification & maintenance
- You can add, remove or move lights later without major rewiring work.
- Troubleshooting is straightforward: most faults come from loose taps, moisture in connections or voltage drop.
Minor downside for reference
Long cable runs may cause voltage drop, making distant lights dimmer; this can be solved by proper planning, thicker‑gauge cable or multiple circuits.
How to Tell Good‑Quality Low‑Voltage Landscape Light Materials When Shopping
You can judge quality by touch, weight, visual details, labels and small parts, without opening the fixture.
1. Check housing weight
- Good quality (cast aluminum / brass / thick stainless steel): Feels solid and heavy for its size. Pick up two similar‑sized lights; the heavier one is usually better.
- Poor quality (thin plastic, thin stamped metal): Feels light, flimsy. Shaking it may produce loose rattling sounds inside.
Warning: Some cheap products spray‑paint plastic to look like metal. Plastic will always be surprisingly light.
2. Inspect surface finish
- High‑quality powder‑coated metal: Uniform matte finish, no streaks, no tiny pinholes, no drips. Run your fingernail gently across surface — good powder coat will not scratch easily.
- Low‑quality spray paint: Shiny thin paint. Nails can leave marks. Over time it peels, chips and lets water cause rust underneath.
- Avoid uneven, blotchy, or bare‑metal spots on housings.
3. Identify real metal vs plastic fake‑metal look‑alike
-
Magnet test (simple trick)
- Cast aluminum / brass: magnet will NOT stick.
- Stainless steel: most grades are weakly magnetic or non‑magnetic.
- Cheap iron / steel: magnet sticks strongly; these will rust.
- Plastic with metallic paint: magnet does not stick, but weight is very light.
If it looks like bronze metal yet weighs almost nothing, it is plastic.
4. Examine the lens
- Tempered glass (premium): Cool hard feel, clear, cannot bend. Tap lightly; gives a solid crisp sound. Will not turn yellow in sunlight.
- Polycarbonate plastic lens (budget): Light, slight give under firm pressure. May already look slightly hazy on‑shelf. Will yellow after 2‑3 years outdoors.
- Reject lenses with visible scratches, bubbles or cloudiness right out of the box.
5. Check ground stake quality (a frequent failure point)
Many otherwise decent lights come with flimsy stakes.
- Good: solid thick metal stake, heavy‑duty.
- Bad: thin brittle plastic stake. It cracks when you push into hard or rocky soil.
Tip: Even if the lamp body is good, replace thin plastic stakes with aftermarket metal ones.
6. Read printed labels and specifications
Do not rely only on product photos. Check product description / sticker:
- IP rating: Minimum IP65 for garden fixtures; IP67 for buried well‑lights. If no IP rating is listed, treat it as low‑quality.
- Material marking: Look for words “die‑cast aluminum”, “solid brass”. If it just says “metal” with no further detail, it may be cheap stamped steel.
- Confirm it is true 12V low‑voltage LED, not mains‑voltage.
7. Check seams, gaskets and seals (waterproof key)
Water leaks are the top reason landscape lights die early.
- Good quality: Rubber / silicone gasket sits neatly between lens cover and housing, full continuous ring. Joint gaps are tight and narrow. Screws are stainless steel.
- Poor quality: Thin foam gasket, broken or incomplete seal; wide uneven gaps between parts. Ordinary iron screws will rust and seize.
Quick red flags — walk away if you see these
- Super low price for a metal‑looking fixture that is extremely lightweight.
- No IP rating listed anywhere.
- Thin foam gaskets, plastic screws, brittle plastic stakes.
- Paint scratches easily with light fingernail pressure.
- Lens already cloudy or yellow on new item.
Quick practical shopping tip
Compare two similar‑style fixtures side‑by‑side: heavier unit, tighter seams, silicone gaskets, clear glass lens and stated IP65+ almost always means better long‑term outdoor performance.


