

Installing a UFO high bay light in a workshop is a manageable project, but it involves high-voltage wiring and working at heights. Safety must be the top priority. Most manufacturers require installation by a qualified electrician to comply with local codes and ensure your safety .
Here is a step-by-step guide based on common UFO high bay designs and safety standards.
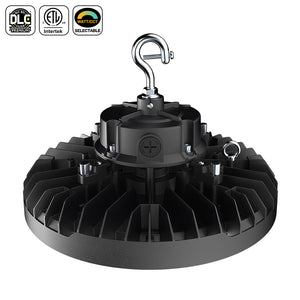
Critical Safety First
Before you begin any work, follow these non-negotiable rules:
-
Turn Off Power: Locate the circuit breaker for your workshop lighting and switch it OFF. Use a voltage tester at the fixture location to confirm the power is dead before touching any wires .
-
Check the Structure: UFO high bays are relatively light (often 6–15 lbs), but they must be mounted securely. Never mount them solely to a standard plastic ceiling electrical box. You must anchor into a structural element like a ceiling joist, beam, or purlin .
-
Verify Voltage: Check the fixture's label to ensure its input voltage (typically 100–277V AC) matches your workshop's supply voltage .
-
Use a Safety Cable: Always attach the included steel safety rope to a separate, independent structural point. This is a critical backup to prevent the fixture from falling if the primary mount fails .

Step-by-Step Installation Guide
Step 1: Preparation and Layout
-
Tools: Gather a screwdriver, wire strippers, pliers, a drill, a stud finder, and appropriate safety gear (gloves, glasses) .
-
Height and Spacing: For a workshop, mounting height is key for good light. A general guideline for UFO lights is to use a spacing-to-height ratio of about 1.2 for even coverage .
-
A 100W light is often suitable for heights of 6–8 meters (about 20–26 ft) .
-
A 150W light is often suitable for heights of 8–11 meters (about 26–36 ft) .
-
-
Mark the Spot: Use a stud finder to locate a solid joist or beam at your desired location. Mark the center point.
Step 2: Mounting the Fixture
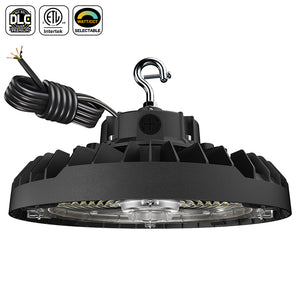
The most common method for a workshop is a hook mount. The process is simple:
-
Install the Anchor: Drill a pilot hole into the joist and install a heavy-duty lag screw eye bolt or a rated J-hook. This anchor must be rated to hold several times the weight of the fixture (e.g., at least 30 lbs for a 6 lb light) .
-
Attach the Hook to the Light: Screw the provided hook into the top of the UFO fixture until it is tight .
-
Hang the Fixture: Lift the light and hang its hook onto your ceiling anchor. Ensure the safety latch (if present) is closed securely .
-
Attach the Safety Cable: Connect the steel safety rope from the fixture to a different anchor point on the structure. Do not clip it to the same hook holding the light .
Step 3: Electrical Wiring
-
Identify Wires: The fixture will typically have three main wires: Black (Hot/Line), White (Neutral), and Green (Ground) .
-
Make Connections: Connect the supply wires to the fixture wires matching color to color (Black to Black, White to White, Green to Ground). Use UL-listed wire nuts for a secure connection .
-
Dimming Wires: You may see additional thin wires (often Purple for DIM+ and Gray or Pink for DIM-). If you are not using a dimmer or sensor, cap these individually with a wire nut. Never connect them to the power lines .
Step 4: Final Checks and Power On
-
Inspect: Double-check that all wire nuts are tight, no bare copper is exposed, and the ground connection is secure .
-
Energize: Restore power at the breaker.
-
Test: Verify the light turns on. If it has sensor or dimming features, test that they function correctly .
Important Installation Tips
-
Retrofitting: If you are replacing an old metal halide or fluorescent fixture, check if you can reuse the existing mounting point. However, be aware that the LED's light distribution pattern may differ, potentially requiring you to adjust the spacing .
-
Heat Clearance: Ensure there is adequate airflow around the fixture. Keep the light at least 0.2m (8 inches) away from any flammable materials and leave a few centimeters of space from the ceiling for heat dissipation .
-
Sensor Placement: If your light has a motion sensor, avoid placing it near air vents, fans, or other moving equipment to prevent false triggering .
If you are ever unsure about a step, especially the wiring, it is always best to consult a licensed electrician.
Quick Installation Checklist
Before You Start
-
Turn OFF the circuit breaker and verify with a voltage tester
-
Confirm fixture voltage matches your supply (100–277V AC)
-
Gather tools: drill, screwdriver, wire strippers, wire nuts, stud finder, safety gear
-
Check that your mounting point is a structural joist/beam (not just a drywall ceiling)
Mounting
-
Locate joist with stud finder and mark center
-
Drill pilot hole and install lag screw eye bolt or J-hook (rated 30+ lbs)
-
Screw hook into top of UFO fixture
-
Hang fixture on ceiling anchor — ensure latch is closed
-
Attach safety cable to a separate structural point
Wiring
-
Connect Black → Black (Hot)
-
Connect White → White (Neutral)
-
Connect Green → Green (Ground)
-
Cap dimming wires (Purple/Gray) individually if not used
-
Tug each wire nut to confirm a tight connection
Final Steps
-
Inspect all connections — no bare copper exposed
-
Restore power at breaker
-
Test light and any sensor/dimming features
Quick Spacing Reference
| Wattage | Recommended Mounting Height |
|---|---|
| 100W | 20–26 ft (6–8 m) |
| 150W | 26–36 ft (8–11 m) |
| 200W+ | 36+ ft (11+ m) |
For a typical workshop ceiling (10–16 ft), a 100W–150W UFO light is usually the right choice.
Call +1 718-688-9188 to speak with a US-based lighting professional expert or browse Commercial UFO High Bay Light Solutions at www.jcelighting.com


