

Here's a practical guide to installing a garden LED flood light, with the key steps and safety points visualized below.

Before you start — the two things that matter most:
- Power off + verify. Always switch off the breaker and confirm with a voltage tester before touching wires. Outdoor circuits should be RCD/GFCI-protected.
- Waterproofing is everything outdoors. Use an IP65+ fixture, gel-filled waterproof connectors, and a sealed junction box — moisture, not the bulb, kills most garden lights.
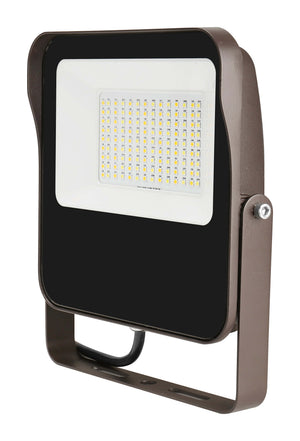
The 7-step flow:
- Plan & choose — IP65+ rating, right lumen output, and decide 12V low-voltage (DIY-friendly) vs 220V mains (Indonesian standard — more care needed).
- Cut power — breaker off, verified dead with a tester.
- Run outdoor cable — UV/outdoor-rated, buried ≥45 cm or in conduit, leave slack.
- Mount fixture — stainless screws on wall/pole/spike, aim beam before tightening.
- Connect wires — AC: brown→L, blue→N, green/yellow→E; DC 12V: red→(+), black→( ).
- Seal — silicone around entries, connections raised off the ground, drain hole facing down.
- Test — restore power, check switch/photocell, look for flicker or heat, re-check after first rain.
If the wiring is 220V mains and you have any doubt, hiring a licensed electrician is the right call — it's far cheaper than the alternatives. Here's the full step diagram:
Garden LED Flood Light — Installation Flow
7 steps · read top to bottom · outdoor-rated parts only
- Pick an IP65+ weatherproof floodlight; match wattage/lumens to the area you want lit.
- Choose 12 V low-voltage (safer DIY) or 220 V mains (needs more care).
- Switch off the breaker; confirm the circuit is dead with a voltage tester.
- Outdoor circuits should be protected by an RCD / GFCI
- Use outdoor / UV-rated cable; bury it at least 45 cm deep or run it inside conduit.
- Leave slack at both ends so connections aren't strained.
- Fix to wall, pole, or ground spike with stainless steel screws.
- Set the beam angle first, then tighten fully.
- 220 V AC: brown → L (live), blue → N (neutral), green/yellow → E (earth) · 12 V DC: red → +, black →
- Use gel-filled waterproof connectors; put all splices inside a weatherproof junction box.
- Seal cable entries with silicone; keep connections raised off the ground.
- Junction box drain/weep hole must face down.
- Flip the breaker back on; test switch / photocell / timer and fine-tune the aim.
- Watch for flicker or heat; re-inspect after the first rain.
Final tip: pick 12V low-voltage lights with a plug-in transformer if you want the safest DIY option — you only need a licensed electrician for the 220V mains side. And when the light eventually dims, the lens is usually dirty before the LED itself fails — a quick clean restores output.

Call +1 718-688-9188 to speak with a US-based lighting professional expert or browse Commercial LED Flood Light Solutions at www.jcelighting.com.


